How To Get Cloud Hosting On Whogohost

Whogohost offers a range of cloud platforms for your deployment needs, depending on the stack your application is built on. Some of our cloud platforms include:
-
LAMP - Linux, Apache, Mysql, PHP
-
LEMP - Linux, Nginx, Mysql, PHP
-
MEAN - MongoDb, Express, Angular, Node.js
-
Ruby on Rails
-
Node.Js
-
MongoDB
...and many more. All you have to do is select the right stack for you.
This tutorial will guide you on steps to purchase a cloud hosting on Whogohost. The advantage of using any of our platforms is that when you select any of your desired platforms, all packages needed for your app deployment will be preinstalled.
Step 1: Getting a cloud hosting
Before you can purchase any of our hosting packages, you need to create an account with us on GO54 if you don't have an existing account with us or simply log in to your client area if you have an account with us.
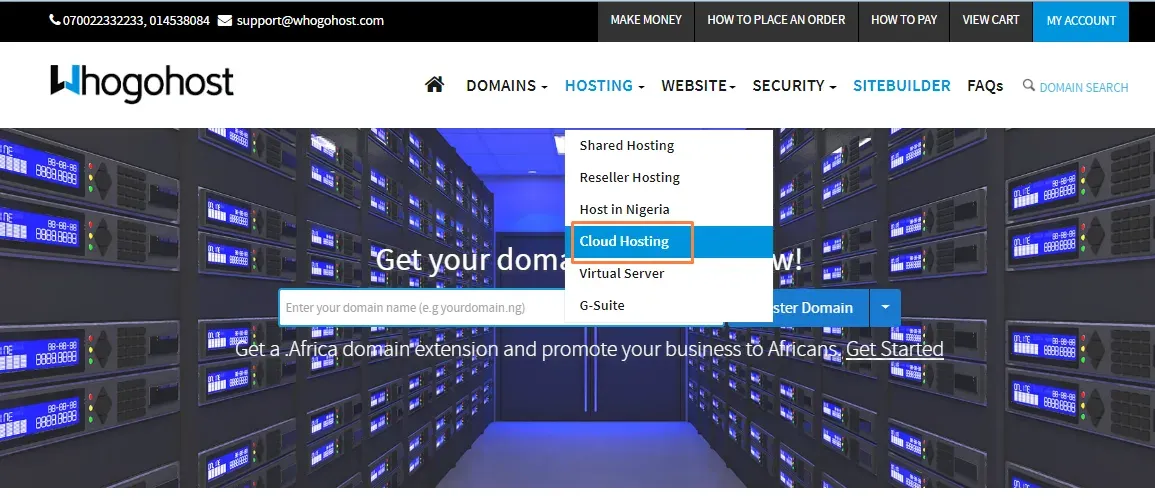
From the menu items, hover your mouse on hosting and select C**loud Hosting** from the drop-down.
Step 2: Choosing cloud hosting
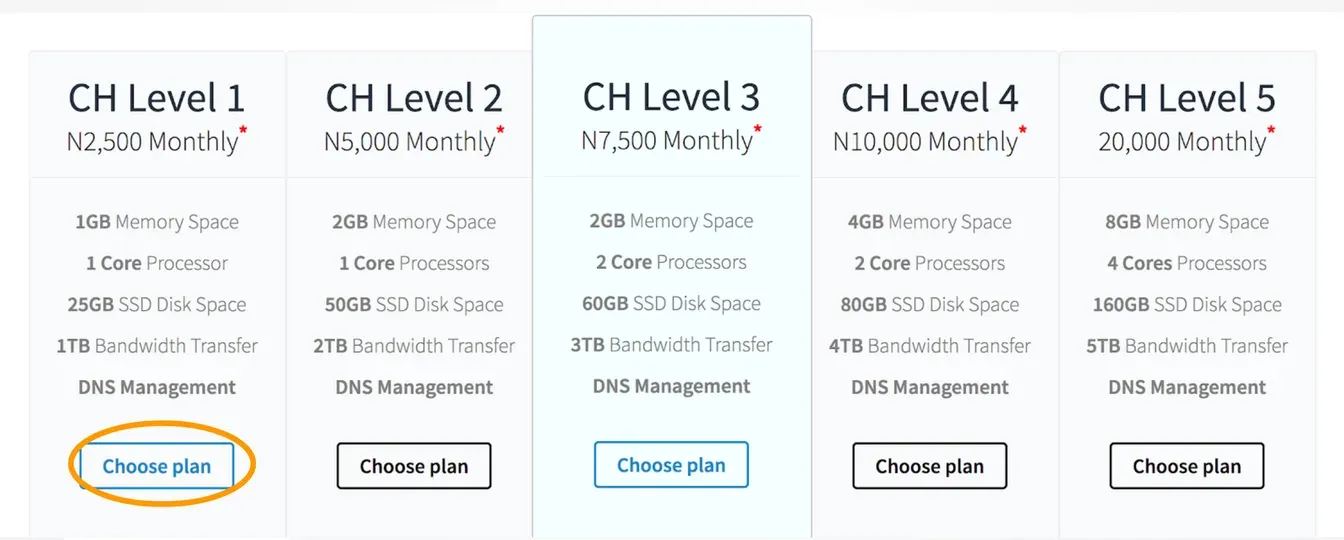
Choose any of the plans that suit your need depending on the memory and storage space needed by your application. You can check this article choosing the right cloud hosting to know more about our different platforms.
Step 3: Select Data Centres and configuration
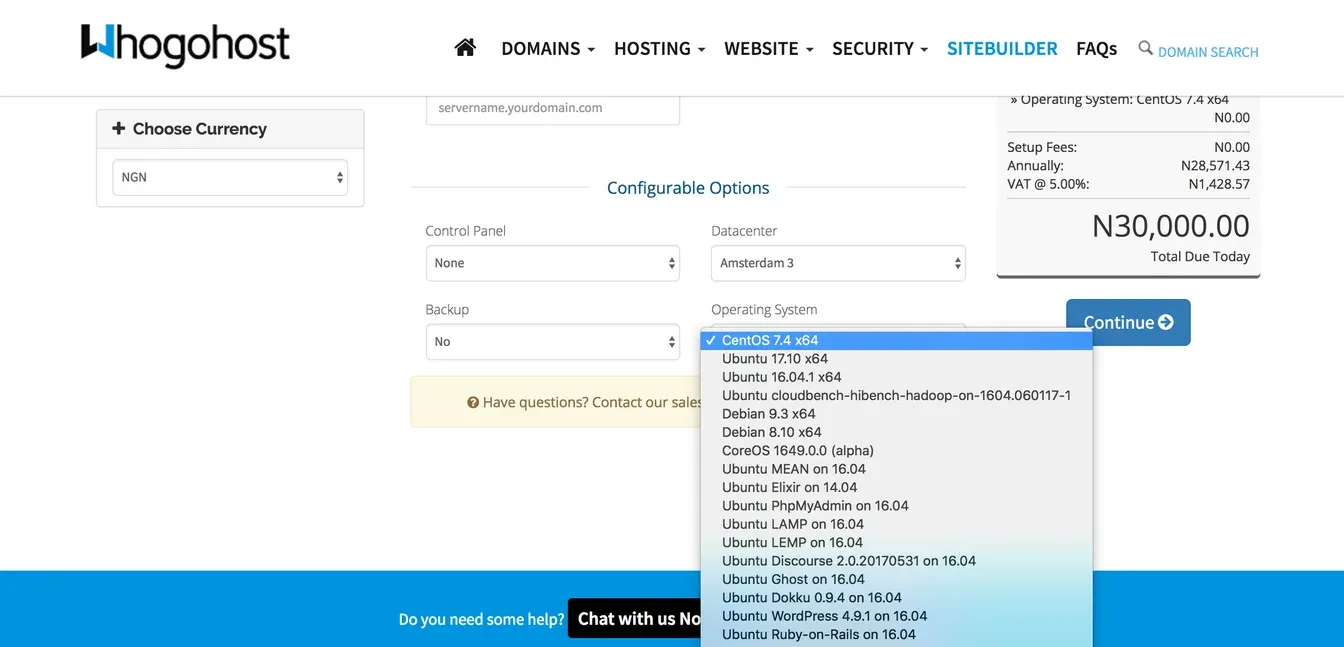
Choose your desired data centre from the list of available data centres.
Select the operating system OS (CentOS, Ubuntu) of the cloud platform or any platform preinstalled (Ubuntu LAMP, Ubuntu LEMP, Ubuntu Node, etc) with different packages.
Step 4: Checkout
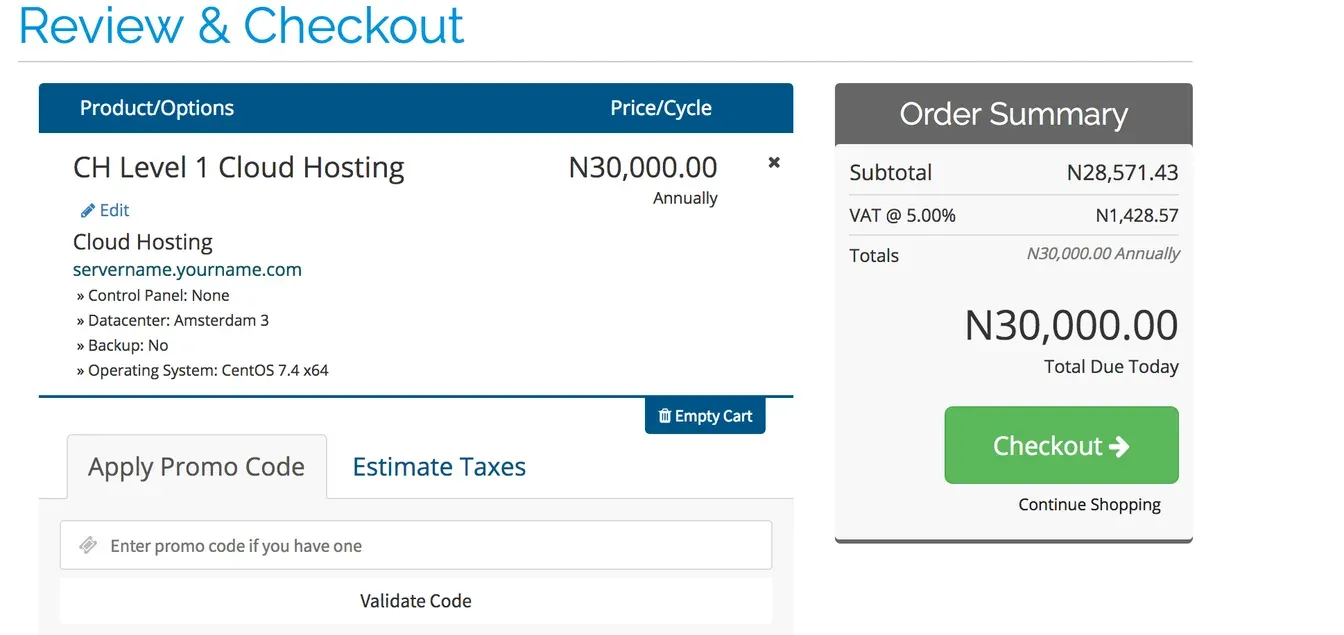
Confirm your order and click checkout. You will get an invoice showing the amount of the selected platform and the acceptable payment options. You can also apply a coupon code if you have any.
Step 5: Managing your server details
After successful payment of your invoice, You will receive a mail with the IP address and root password of your server. Take note of these. The image below shows a sample mail including the IP address and password of the server. You will need Terminal (for macOS) or Git Bash (for Windows - http://gitforwindows.org)
Step 6: Log in to your server via ssh
For macOS, you will use the terminal app. For Windows, use Git Bash, downloaded from the link in the previous page.
Open the respective app and run the command below (replace 1.2.3.4 with actual IP). When you get to the prompt for a password, paste the password from your email
Step 7: Change your root password
You will be asked to change the root password. Paste the old password where relevant and enter your new password. Make sure you take note of this new password.
Step 8: Access your live server
After resetting your password you can install more dependencies that your application needs for deployment.
Enter your server's IP address into your browser to access your live server and you are good to go.Want to read more posts like this? Check out how to deploy your node.js application.
Related Posts

How to Start a Web Hosting Company in Nigeria
Learn how to launch a web hosting business in Nigeria. Get a step-by-step guide to setup, reselling, legal structure, and pricing.
 Chinedu Joseph Igbudu
How to Fix a 500 Internal Server Error
Fix a 500 internal server error on your site with simple WordPress, cPanel, PHP, and .htaccess troubleshooting steps.
Chinedu Joseph Igbudu
How to Use cPanel: Guide for Hosting Clients
Master cPanel basics with step-by-step guides on email, domains, backups, and more. Ideal for Nigerian hosting clients using shared hosting.
Chinedu Joseph Igbudu